

Cart
0
Table of Contents
- What Overlanding Gear Actually Means for Beginners
- Essential Overlanding Gear Checklist
- Budget Overlanding Gear: What to Buy First
- Overlanding Recovery Gear for Beginners
- First Overlanding Trip Checklist: Before You Go
- Common Mistakes Beginners Make, and How to Avoid Them
- Frequently Asked Questions
Last Updated: October 11, 2026
What Overlanding Gear Actually Means for Beginners
Overlanding is self-reliant travel through remote terrain where you bring everything you need to survive and thrive. Unlike casual camping trips, overlanding requires gear that handles harsh conditions, vehicle breakdowns, and days without resupply. The best overlanding gear for beginners strikes a balance between durability and affordability, you don't need expedition-grade equipment for your first trip, but you do need reliability.
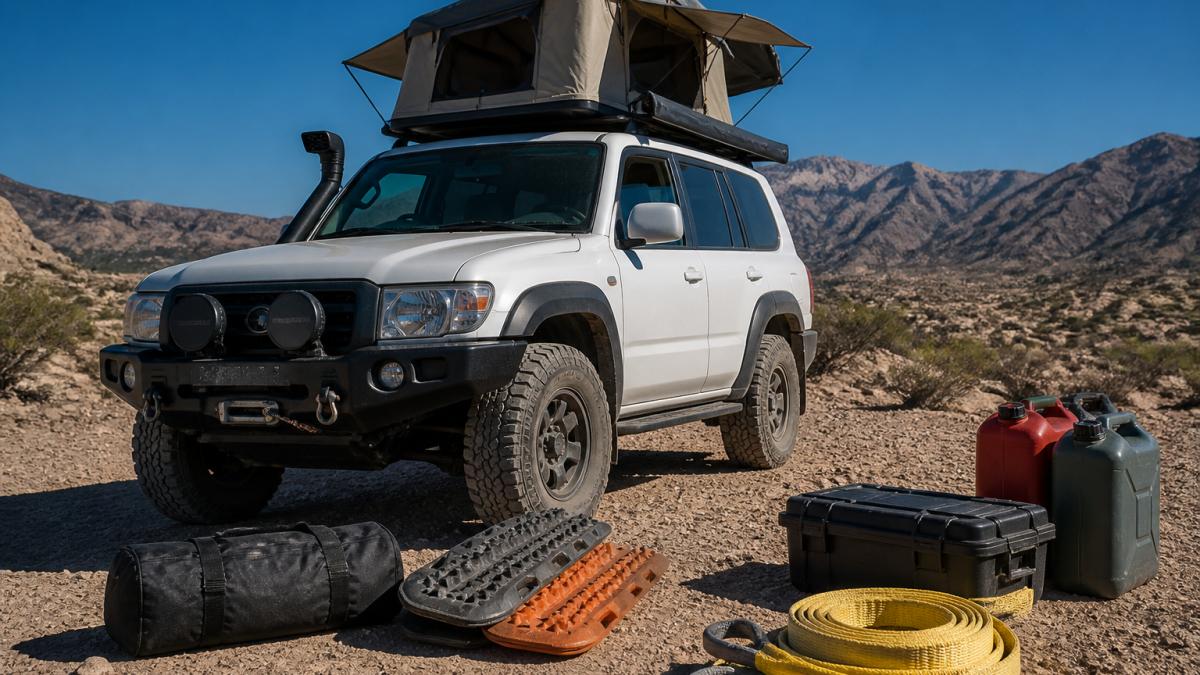
Start with essentials, test them on short trips, then add specialized equipment as your experience grows. Essential categories are vehicle recovery, tire management, navigation, communication, medical supplies, and shelter.
Essential Overlanding Gear Checklist
Vehicle Recovery Gear
Essential recovery items include:
- Recovery strap or rope, rated for your vehicle's weight, typically 20,000-30,000 pounds capacity
- Shackles, heavy-duty metal connectors that attach straps to recovery points
- Traction boards, lightweight panels that create grip under tires on sand or mud
- Vehicle jack, a high-lift jack rated for your vehicle's weight
- Shovel, short-handled for digging out stuck tires
Start with a recovery strap, shackles, and traction boards, these handle 90% of beginner situations.
Tire Management and Traction
Tire pressure control is the single most important overlanding skill. Lowering tire pressure increases traction on soft terrain; raising it protects tires on rocky ground. You need tools to manage this safely.
Essential tire gear:
- Air compressor, 12-volt or portable model that runs off your vehicle
- Tire deflator, allows controlled pressure reduction without losing air to the environment
- Tire pressure gauge, accurate to within 1 PSI
- Tire repair kit, plugs, patches, and a hand pump for emergency fixes
- All-terrain tires, designed for mixed terrain, not highway tires
A basic 12-volt compressor and manual tire deflator cost far less than a flat tire replacement in remote terrain. Test your setup at home before your first trip.
Navigation and Communication
Navigation essentials:
- GPS device or smartphone app, offline maps downloaded before you leave
- Paper maps, backup navigation when electronics fail
- Compass, simple, reliable, never needs batteries
- Two-way radio or satellite messenger, lets you call for help when cell service fails
For first trips, a smartphone with offline maps plus a compass covers navigation.
Budget Overlanding Gear: What to Buy First
Phase 1: First Trip Ready (1-3 days, $800-$1,200)
- Recovery strap (20,000-30,000 lb rated): $40-$80
- Shackles (pair, heavy-duty): $30-$50
- Traction boards (set of two): $60-$120
- 12-volt air compressor: $50-$100
- Tire deflator (manual): $15-$25
- Tire pressure gauge (0-60 PSI): $10-$20
- First-aid kit (comprehensive): $40-$80
- Tent (3-season, 2-person): $150-$300
- Sleeping bag (rated for expected temps): $80-$150
- Sleeping pad (foam or inflatable): $30-$80
- Water containers (5-10 gallons total): $20-$40
- Basic tool kit (socket set, wrenches, pliers): $40-$80
- Headlamp (LED, hands-free): $20-$40
- Spare fluids (oil, coolant, brake fluid): $30-$60
- Jumper cables or portable jump starter: $30-$60
Phase 1 totals $615-$1,165 in gear alone.
Phase 2: After 3-5 Trips ($1,200-$2,500 additional)
- Rooftop tent or ground tent upgrade: $400-$1,200
- Camp kitchen (stove, cookware, cooler): $200-$500
- Satellite messenger or two-way radio: $150-$400
- Tire repair kit (plugs, patches, CO₂): $30-$60
- Additional storage (roof rack, cargo box): $300-$800
- Recovery equipment upgrade (kinetic strap, snatch block): $150-$300
- Navigation upgrade (dedicated GPS device): $200-$400
- Lighting upgrade (camp lantern, work lights): $80-$200
Phase 3: Established Overlander ($2,000+ additional)
How to Choose Between Budget and Mid-Range Gear
- Recovery strap: Budget ($40-$60) works for vehicles under 5,000 lbs. Mid-range ($80-$150) is safer for heavier vehicles or remote terrain.
- Air compressor: Budget models ($50-$80) inflate in 10-15 minutes. Mid-range ($120-$200) inflates in 5-8 minutes.
- Tent: Budget ($150-$250) keeps you dry. Mid-range ($300-$600) adds ventilation and durability.
- Sleeping bag: Buy for the lowest temperature you'll encounter.
What to Buy First vs. What Can Wait
Priority order for Phase 1:
- Recovery strap, shackles, traction boards, These prevent you from being stranded. Non-negotiable.
- Air compressor and tire deflator, Tire pressure control is overlanding's most important skill. You'll use these on every trip.
- First-aid kit, Remote terrain means no ambulance. A comprehensive kit is insurance.
- Tent and sleeping bag, You need shelter. Don't skip this to save money on gear you won't use.
- Water containers, Dehydration is a real risk. Carry more than you think you'll need.
- Basic tools and spare fluids, Most breakdowns are fixable with a socket set and extra oil. Carry them.
- Navigation (offline maps + compass), Getting lost burns fuel and daylight. Download maps before you leave.
- Communication (two-way radio or satellite messenger), Cell service fails in remote areas. This is your safety net.
- Headlamp, Nighttime navigation and camp setup require light. A $20 LED headlamp is enough.
- Everything else, Camp kitchen, rooftop tent, auxiliary fuel, winches, these are Phase 2 and beyond.
Low-Cost Alternatives and Testing Before Buying
Borrow or rent gear before buying. Test your Phase 1 setup on a local day trip before venturing into remote terrain.
Pro Tip
Weigh your loaded vehicle before your first trip. If you're over payload capacity, remove items in reverse priority order until you're under the limit. Excess weight stresses suspension, reduces traction, and increases fuel consumption, all problems that show up in remote terrain.
Start with Phase 1 essentials, test them on short trips, then invest in Phase 2 upgrades based on what you actually need.
Overlanding Recovery Gear for Beginners
Recovery gear must match your vehicle's weight and be used correctly.
Understanding Recovery Strap Ratings and Vehicle Weight
A recovery strap rated for your vehicle's gross vehicle weight rating (GVWR) is non-negotiable. Your GVWR is printed on a placard inside the driver's door frame or in your owner's manual.
- Vehicles under 4,500 lbs GVWR: 15,000-20,000 lb rated strap
- Vehicles 4,500-6,500 lbs GVWR: 20,000-30,000 lb rated strap
- Vehicles 6,500-8,000 lbs GVWR: 30,000-40,000 lb rated strap
- Vehicles over 8,000 lbs GVWR: 40,000+ lb rated strap
Match the strap rating to your actual GVWR, buying below it risks failure; buying far above it adds unnecessary weight.
Recovery Points and Shackle Compatibility
Your vehicle has factory recovery points rated for specific loads. Identify these in your owner's manual. Shackles connect your strap to the recovery point; the shackle rating must match or exceed your strap rating.
When attaching a strap: use a shackle rated for the strap's capacity, ensure the pin is fully seated and tight, and never wrap a strap directly around a frame member. If your vehicle lacks factory recovery points, do not attempt recovery without professional installation of rated hardware.
Traction Boards: How They Work and When to Use Them
Traction boards create grip under tires on sand, mud, or snow. Position the board under the tire, drive slowly onto it, and retrieve once you've gained traction. They weigh 15-25 lbs per pair and cost $60-$120.
The High-Lift Jack: Mechanical Advantage When You're Truly Stuck
A high-lift jack provides mechanical advantage when traction boards don't work. Choose a jack rated for your vehicle's GVWR. High-lift jacks are powerful and dangerous, read instructions, practice at home, never stand under a raised vehicle, and use a base plate. For Phase 1, a high-lift jack is optional.
The Shovel: Digging Out Stuck Tires
A short-handled shovel (24-28 inches) costs $20-$50 and weighs 2-4 lbs. Dig in front of and behind the tire, clear the wheel well, place traction boards, and drive forward. A shovel solves problems that would otherwise require a jack or tow.
Building Your Phase 1 Recovery Kit
Phase 1 recovery kit: recovery strap ($40-$80), shackles ($30-$50), traction boards ($60-$120), shovel ($20-$50). Total: $150-$350. Practice using these at home before your first trip.
Watch Out
Recovery operations can cause serious injury or death if performed incorrectly. Never attempt to recover a vehicle without understanding the equipment and the risks. If you're unsure, ask an experienced overlander to show you, or take a recovery training course offered by off-road clubs or professional instructors.
First Overlanding Trip Checklist: Before You Go
Vehicle inspection:
- Check all fluid levels (oil, coolant, brake fluid, power steering)
- Inspect tire condition and pressure
- Test all lights and wipers
- Verify battery condition and connections
Gear inspection:
- Recovery strap is rated for your vehicle weight
- Shackles are clean and functional
- Traction boards are free of cracks
- Air compressor runs without leaks
- Tire deflator works smoothly
- First-aid kit is stocked and accessible
- Tent seams are sealed and stakes are present
- Sleeping bags are rated for expected temperatures
- Water containers are clean and full
Route planning:
- Download offline maps
- Identify water sources and campsites
- Share your route with someone at home
- Check weather forecasts
- Verify vehicle fuel capacity covers the distance
Communication:
- Charge all electronics fully
- Test two-way radio or satellite messenger
- Ensure someone at home knows your return date
This checklist takes two hours but prevents most beginner problems.
Common Mistakes Beginners Make, and How to Avoid Them
Mistake 1: Overpacking. Excess weight increases fuel consumption, reduces traction, and stresses suspension. Solution: weigh your loaded vehicle before your first trip.
Mistake 2: Ignoring tire pressure. Tire pressure control is overlanding's most important skill. Solution: practice airing down and up at home.
Mistake 3: Skipping communication devices. Cell service fails in remote areas. Solution: add communication gear to your Phase 1 setup.
Mistake 4: Buying premium gear before testing basics. Expensive rooftop tents are wasted money if you don't know your actual needs. Solution: start with budget-friendly gear and upgrade based on real experience.
Mistake 5: Neglecting vehicle maintenance. Skipping maintenance before trips leads to breakdowns in remote locations. Solution: follow your vehicle manufacturer's maintenance schedule and add pre-trip inspections.
| Common Beginner Mistakes | Root Cause | Prevention Strategy |
|---|---|---|
| Vehicle gets stuck | Incorrect tire pressure or missing traction boards | Practice pressure management; carry traction boards |
| Communication fails | No backup device when cell service ends | Add satellite messenger or two-way radio to Phase 1 |
| Gear breaks in field | Low-quality equipment or poor maintenance | Buy from trusted retailers; test gear before trips |
| Vehicle overloaded | Buying too much gear at once | Weigh vehicle; start with essentials only |
| Navigation problems | Relying solely on smartphone GPS | Download offline maps; carry paper maps and compass |
Pro Tip
Before your first overlanding trip, test every piece of gear at home or on a local day trip. This reveals problems when you can turn back, not when you're 50 miles from the nearest road.
The best overlanding gear for beginners focuses on vehicle recovery, tire management, navigation, communication, and shelter, the foundations that keep you safe and mobile. Arizona Desert Gear offers entry-level versions of essential gear, with free shipping on all USA orders and a 30-day return policy.
Build your overlanding setup step by step. Start with Phase 1 essentials, test them on short trips, then add specialized equipment as your skills grow. This approach saves money and ensures every piece of gear earns its place in your vehicle.
Off-Road Vehicle Recovery Guidelines provide official safety standards for recovery operations. Tire Pressure Management for Off-Road Driving explains how pressure changes affect traction and safety. First Aid and Emergency Preparedness for Remote Travel covers medical readiness for overlanding trips.
SHOP NOW with Arizona Desert Gear and equip yourself with gear that performs where it matters most.
Frequently Asked Questions
What gear do you absolutely need to start overlanding?
Start with recovery gear (straps, shackles, traction boards), tire management tools (air compressor, tire deflator, pressure gauge), a first-aid kit, navigation tools, a communication device, basic tools and spare fluids, water storage, and shelter. Overlanding differs from regular camping because you're traveling remote terrain where self-recovery and extended communication matter. Prioritize safety and vehicle recovery before comfort items like camp kitchens or rooftop tents.
How much should a beginner budget for an overlanding gear setup?
Budget overlanding gear costs depend on what you already own and trip length. Start with essentials, recovery gear, tire tools, first aid, navigation, and basic shelter, then add items as your experience grows. Rather than spending heavily upfront, invest in quality items one category at a time. Check Arizona Desert Gear's website for current pricing that fits your budget.
What's the difference between overlanding gear and regular camping gear?
Overlanding gear prioritizes vehicle recovery, tire management, and remote communication because you're traveling off-road, often far from help. Regular camping gear focuses on shelter and comfort. Overlanding requires recovery straps, traction boards, air compressors, two-way radios, and redundant navigation. Your vehicle becomes your base, so durability and reliability matter more than weight savings.
Do I need a rooftop tent for my first overlanding trip?
No. A rooftop tent is convenient but not essential for beginners. A ground tent works fine for first trips and costs less. Rooftop tents add payload weight and expense; start with proven shelter, then upgrade if multi-night trips or ground conditions make a rooftop tent worth the investment. Test your setup on shorter trips before committing to expensive additions.

