

Cart
0
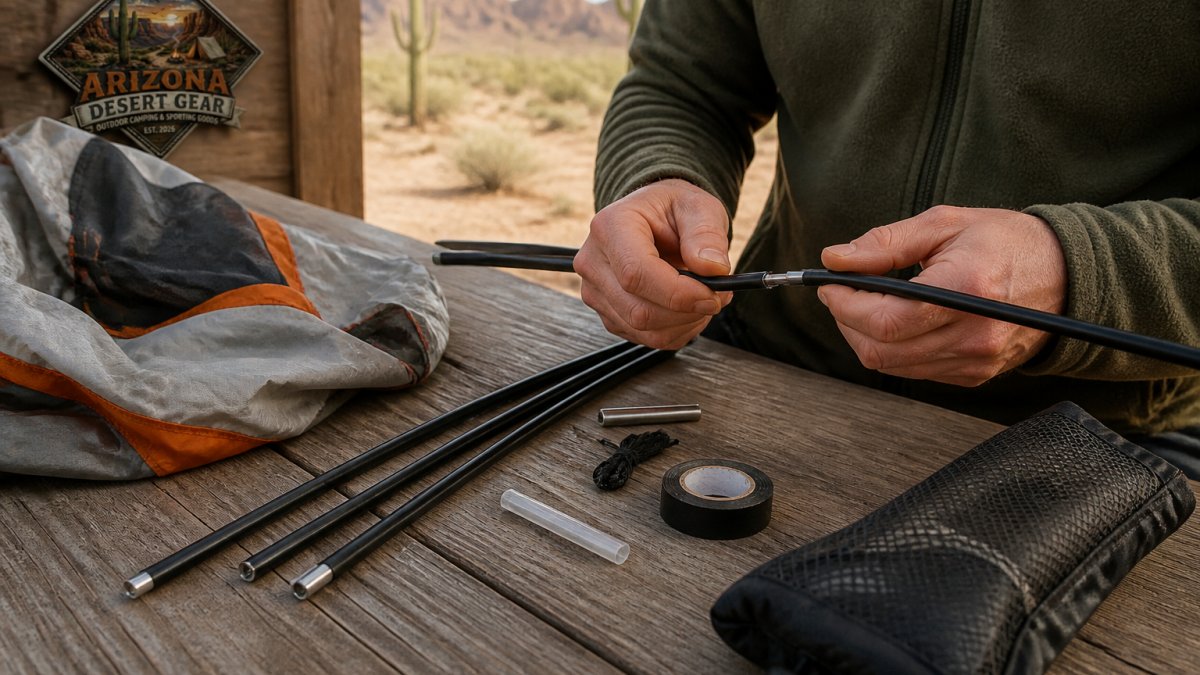
Table of Contents
- How to Fix Broken Tent Poles: What You Need Before You Start
- Diagnose the Damage: Bent, Cracked, Split, or Shattered Poles
- Emergency Field Repairs at the Campsite
- How to Use a Tent Pole Repair Sleeve for a Permanent Fix
- Replace a Broken Tent Pole Section: Measuring and Matching
- Tent Pole Shock Cord Repair and Rethreading
- Material Matters: Aluminum, Fiberglass, and Carbon Fiber
- Prevention and Maintenance: Keeping Tent Poles Intact
- Frequently Asked Questions
Last Updated: October 14, 2026
How to Fix Broken Tent Poles: What You Need Before You Start
The fix depends on where the damage is and what the pole is made of.
This guide covers damage checks, field repairs, permanent fixes, and measuring a replacement section.
Tent pole repair comes down to three things: the type of break, the pole material, and whether you have the right parts on hand.
Before you start, gather these items:
- A pole repair sleeve or splint that matches your pole diameter
- Duct tape or clear packing tape
- A pole repair kit with extra shock cord and ferrules
Most weigh almost nothing and fit in a side pocket, packing them before every trip beats improvising.
Diagnose the Damage: Bent, Cracked, Split, or Shattered Poles
The first step is figuring out exactly what failed, because a bent, cracked, and shattered pole each need a different fix:
- Bent pole: The section curves but the metal or fiberglass is still whole. You can often straighten a mild bend by hand.
- Cracked pole: A hairline split runs along the section. It will spread under tension.
- Split pole: The crack has opened up, usually near a ferrule or joint.
Run your fingers along each section after every trip; small cracks hide near joints where stress builds up.
Assessing Whether a Repair Is Safe
A repair is safe when the pole still carries load and the fix keeps the break from flexing. If a section is shattered in more than one place, or the ferrule is crushed, replace it.
A failed pole under tension can whip back and hit you or tear the tent fabric. Never tape a pole and call it done if the break sits at a high-stress bend point.
Repair or Replace? A Decision Guide
Use this table to decide fast:
| Damage | Best Fix | Safe to Use? |
|---|---|---|
| Slight bend, no crack | Straighten by hand | Yes |
| Single crack near joint | Repair sleeve plus tape | Yes, short term |
| Split section, one spot | Replacement section | Yes, after swap |
| Shattered or crushed ferrule | Replace the whole pole | No |
When in doubt, replace the section. A new pole section costs far less than a ruined trip.
Emergency Field Repairs at the Campsite
Field repairs get you through the night, not the season. Two tools do most of the work: a repair sleeve and tape.
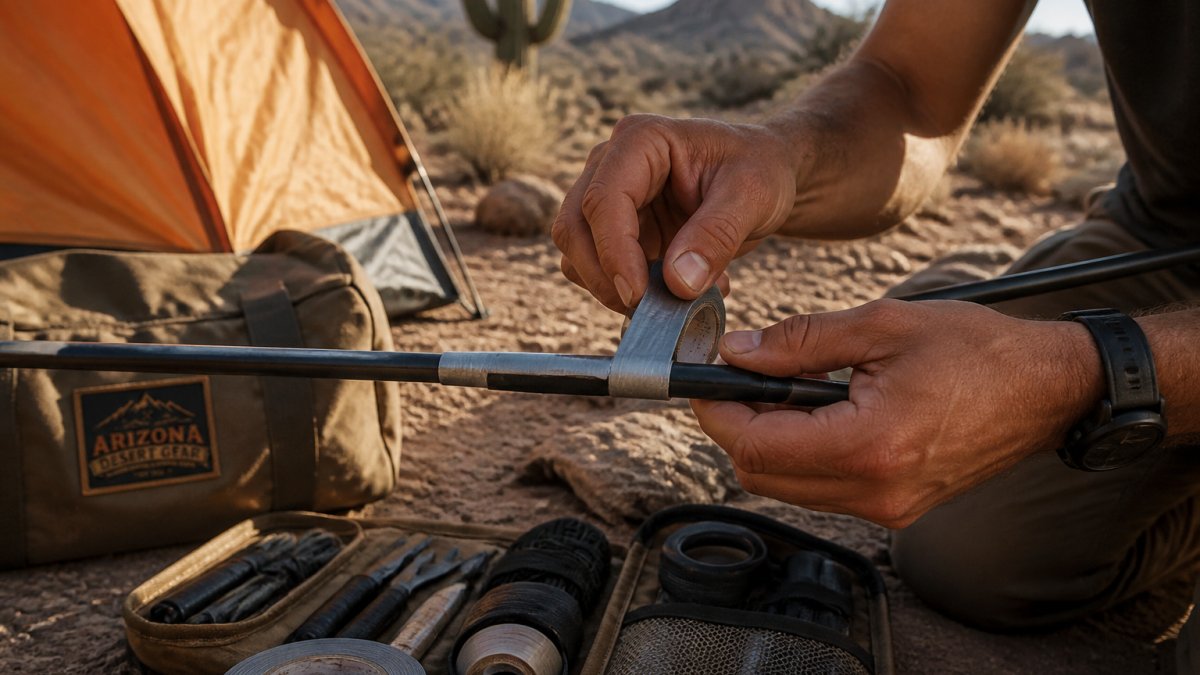
Splint a Pole with a Repair Sleeve
A tent pole repair sleeve is a short tube that slides over the broken section and holds it straight. Match it to your pole diameter, usually 8.5mm or 11mm on most camping tents.
Slide it over the break so it covers at least 5cm on each side, centered over the crack, so the broken spot does not flex.
Secure the Fix with Tape
Tape holds the sleeve in place. Duct tape works in a pinch, but clear tape lets you see the break and check it later.
Wrap three to four tight loops over each end of the sleeve. Do not tape over the joint where the next section slides in, or the pole will not fit together.
Pro Tip
Wrap tape in the same direction the pole bends, not against it. This keeps the tape from peeling off when the pole flexes in the wind.
How to Use a Tent Pole Repair Sleeve for a Permanent Fix
A repair sleeve can be a permanent fix, but only when it matches the pole and the break sits in a low-stress area. Get either wrong and it fails on the next windy night.
Sizing the Sleeve to the Pole
Sleeves are sold by inner diameter, and the fit is not forgiving. Measure the pole's outer diameter across the flat of the section, not across a ferrule.
A loose sleeve slides and lets the break flex; a tight one will not seat without forcing, which can split the section further.
Sleeve length matters too: it should extend at least 2 to 3 inches past each side of the break, and longer for a break near the middle of a section.
Step-by-Step Permanent Repair
- Disassemble the pole. Pull the shock cord out of the damaged section so you are working with a bare tube, sleeving with the cord threaded traps it under the sleeve.
- Clean and dry the section. Wipe off sand, grit, and old tape residue; adhesive will not bond to a dusty surface.
- Dry-fit the sleeve. Slide it over the break and center it, confirming equal overhang on both sides and that the next section still slides into the ferrule.
- Scuff the bonding area. Lightly sand the pole surface under where the sleeve will sit so epoxy has something to bite into.
- Bond the sleeve. Apply two-part epoxy rated for metal and plastic inside the sleeve and over the break, slide it into place, and rotate a quarter turn to spread the epoxy.
- Wipe the squeeze-out. Clean excess epoxy before it cures, especially near the ferrule where it can block the next section.
- Let it cure fully. Follow the epoxy's cure time, typically overnight at room temperature.
- Re-thread the shock cord and test. Reassemble the pole, then flex it gently by hand before trusting it under tension.
When a Sleeve Is the Wrong Fix
A sleeve is a load-sharing patch, not a replacement for structure. Replace the section when:
- The break is at or inside a ferrule. The ferrule is the highest-stress point on the pole; a sleeve cannot restore a crushed or cracked ferrule, and the joint will fail again.
- The section is shattered in more than one place. Multiple breaks mean the tube has lost its column strength, and a single sleeve cannot bridge them.
- The pole is carbon fiber. Carbon shatters rather than bends, and a sleeve bonded over a shattered carbon section does not restore its stiffness, the repair can fail suddenly under load. Replace carbon sections.
Watch Out
Never sleeve a pole that is bent as well as cracked. Straighten the bend first or replace the section. A sleeve bonded over a bend locks the curve in place and the pole will keep pulling to that side under tension.
A properly sized, properly bonded sleeve on a single clean crack in an aluminum section can outlast the original pole. A sleeve on a crushed ferrule or shattered carbon tube is a trip-ending failure waiting to happen.
Replace a Broken Tent Pole Section: Measuring and Matching
Replacing a whole section is the cleanest fix. To replace a broken tent pole section, you need three numbers: diameter, length, and ferrule size.
Measure the old section end to end, not including the ferrule tip. Then measure the pole diameter with a ruler or calipers.
Match the replacement to the original material too. An aluminum section will not flex the same as fiberglass, and mixing them can stress the frame.
Watch Out
Never mix pole diameters in one frame. A thinner section will bow first and snap under wind load, which can collapse the tent around you.
Tent Pole Shock Cord Repair and Rethreading
The shock cord is the elastic that pulls pole sections together and keeps them from scattering when you unpack the tent. When it loses stretch, the poles flop, the frame feels loose, and pitching takes twice as long.
Most guides skip shock cord, but it is one of the most common tent pole failures and cheap to fix at home.
Sizing the New Cord
Shock cord is sold by diameter, which must match the pole's inner channel. Common sizes are 2mm, 2.5mm, 3mm, and 4mm, too thin and it will not pull the sections snugly, too thick and it can jam at a ferrule. Match the original; if you cannot measure it, a 3mm cord fits most standard aluminum and fiberglass poles, while ultralight poles often use 2mm or 2.5mm.
Rethreading Without Losing the Order
The hard part of shock cord repair is not the knot, it is keeping the sections in the right sequence. Sections are tapered and sized to fit one direction, and the wrong order means starting over.
Lay the sections out on a flat surface in assembly order, ferrule ends pointing the same way. Number them with a marker or tape on long poles, and take a photo before pulling the old cord out.
To rethread:
- Attach a leader. Tie the new cord to a thin wire, fishing line, or small washer to pull through the sections.
- Feed from the first section. Push the leader through the first section, then the second, and so on, following assembly order. Do not skip ahead.
- Pull the cord through. Once the leader exits the last section, pull the cord until it is snug through the whole pole.
- Tie off the ends. Tie a knot at each end larger than the pole's inner diameter so the cord cannot pull back through, a figure-eight works well. Trim the excess, leaving about an inch of tail.
- Melt the tip. Carefully melt the trimmed end with a lighter to stop fraying, but do not melt the knot itself.
- Test the tension. Assemble the pole; sections should pull together firmly with no rattle or slack. If it feels loose, the cord is too long. If it is hard to fold, the cord is too short.
When to Replace the Cord vs. When to Replace the Pole
Shock cord is a wear item. Replace it when it has lost its stretch, is frayed or discolored, or the pole no longer folds and holds together on its own.
Replace the pole section instead when the cord failure is a symptom of a bigger problem, a cracked ferrule, a bent section, or a splintered tube. New cord will not fix a structural failure.
Pro Tip
Keep a spare length of shock cord in your repair kit. It weighs almost nothing and turns a floppy, unusable pole back into a working frame at camp.
A pole with fresh cord assembles faster, pitches tighter, and stores smaller, one of the cheapest upgrades for an aging tent.
Material Matters: Aluminum, Fiberglass, and Carbon Fiber
Each material breaks and repairs differently, and the wrong fix can make things worse.
- Aluminum: Bends before it breaks. You can often straighten a bent aluminum pole by hand. It takes a sleeve and tape well.
- Fiberglass: Cracks and splinters. Once it splinters, replace the section. Sleeves work but do not restore full strength.
- Carbon fiber: Light and stiff, but it shatters rather than bends. A shattered carbon section cannot be repaired safely. Replace it.
For desert and windy conditions, aluminum poles hold up best because they flex instead of snapping.
Prevention and Maintenance: Keeping Tent Poles Intact
Most pole breaks come from handling, not weather. A little care adds seasons to a tent frame.
- Inspect poles after every trip for small cracks
- Store poles straight, never bent or coiled tight
- Clean sand and grit out of the ferrules
A pole repair kit in your pack turns a trip-ending break into a ten-minute fix. Keep one with your tent at all times.
Key Takeaway
The best repair is the one you never need. Inspect, store, and tension your poles correctly, and you will spend more nights sleeping than fixing.
Frequently Asked Questions
How do you fix a broken tent pole in the field?
For a quick field repair, slide a repair sleeve over the break and secure it with duct tape. If you don't have a sleeve, a hollow aluminum or fiberglass splint from a repair kit works. Wrap tape tightly above and below the break to keep the splint in place. This gets you through the trip, but replace or permanently repair the section once you're home.
Can you repair a bent tent pole, or should you replace the section?
If the bend is slight and the pole isn't kinked or cracked, you can sometimes straighten it carefully by hand. However, a sharp bend or any sign of cracking means the pole has lost strength. In that case, replace the section. A bent pole that snaps under tension can damage your tent fabric, so replacing it is the safer choice.
How do you use a tent pole repair sleeve?
A tent pole repair sleeve is a hollow tube that fits over the broken section. Slide it over the break, center it, and secure it with tape or the sleeve's built-in clamp. Make sure the sleeve diameter matches your pole's diameter. This creates a splint that restores enough rigidity to pitch the tent. For a permanent fix, use a sleeve made for your pole's material and diameter.
How do you fix a tent pole shock cord?
If the shock cord snaps or loses elasticity, you'll need to rethread it. First, remove the old cord from all pole sections. Then, tie one end to an anchor point (like a small washer or knot) and thread the new cord through each section, pulling it taut. Tie off the other end, leaving a few inches of slack so the poles can flex. Use a cord diameter that matches the original.
A broken pole does not have to end your trip. With a repair sleeve, tape, and a spare section, you can patch a pole in the field and swap it out properly at home.
At Arizona Desert Gear, we carry tents and camping tools built for harsh conditions, backed by free shipping within the USA and a 30-day return policy. Our gear is made to keep you moving when the terrain gets rough.
Shop now with Arizona Desert Gear and head out knowing your shelter can take a hit and keep standing.

